DIY

Within the Pages of a Book

Sunday, December 30, 2012

I love to read. I read blogs, magazines, books...pretty much anything with words! I have a nook that I enjoy reading books on, but there is nothing like turning the pages of a good book. Plus, I love the library! So...I thought it fitting that my first sewing project on my new sewing machine (thanks, Momma) be these awesome DIY book marks that I found on Pinterest


They are super simple to make. I chose a wide, leopard print ribbon, and then I folded, pinned, sewed, and viola! 

Want to make your own? You can find the full tutorial here

christmas decorations

The End's Not Near, It's Here

Saturday, December 29, 2012

I hope that my fellow fans of The OC appreciated the title of this post. I am still hopeful that there will one day be a reunion! Anyway, the end of 2012 is here...does anyone else feel like it should still be September? My schedule kept me pretty busy during the month of December (made obvious by my lack of blog posts...sorry about that). However, I plan to fill you in on all that has been happening in the Fletcher house over the past month in this post! 


I had a lot of fun decorating for Christmas this year. I really wish that I could leave our tree up all year round...that is how much I love it, but I had a lot more decor than the tree. I made these little snow globes, placed garland anywhere I could manage, and decked the walls with some DIY art. 


onth of December decorating and enjoying hot cocoa snuggled up on the couch. I did a lot of shopping for Christmas presents and spent lots of time with my wonderful family! 

PLUS...I purchased Young House Love! There will be a ton of DIY projects to come in the next several months! I have already flipped through the entire thing, and I have plans to use several ideas from the book! John and Sherry are awesome!


What else is coming in 2013? Well, I have lots of stuff planned! There has been a lot of progress on the porch (post coming soon), there are some color changing plans for the kitchen that should be executed in the coming weeks, and I have decided that I am going to give but first comes love a little makeover!

I HOPE YOU ARE EXCITED! 

Calendar

It's December!

Wednesday, December 12, 2012

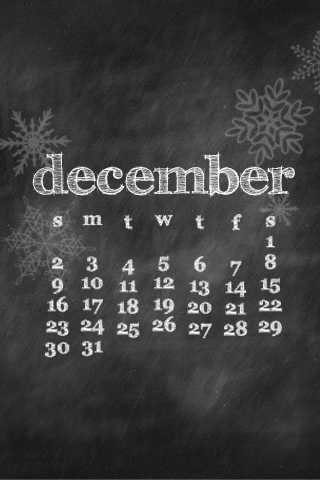
Wow...I can't believe that it is December, and less then 2 weeks till Christmas! As I have every other month (except January) this year I would like to fill you in on what I did in November and what I have planned for December...and of course there will be a calendar for all of my iPhone loving friends out there!

November was a month to be thankful for! I was blessed with new opportunities, time with my family, and some great new friends. It was a busy month filled with photo shoots, DIY, and celebrations!


There are some great things in store for December...even though it is almost halfway gone. I have been a busy working DIY projects that I can't wait to share with all of you! I hope you are looking forward to my upcoming posts! 

Here is your iPhone wallpaper calendar! 


Britt

christmas

A Real Tree...Well, Kinda Real

Sunday, November 25, 2012

I was looking forward to putting up my Christmas tree up all week. I didn't want to do it before Thanksgiving, but I had every intention of putting it up after work on Saturday. I love our Christmas tree! You can check out last year's post about it here. Anyway...I was especially excited about it this year, because I was finally going to get to put the tree stand to use! So, after work I got home and found that Dane had already gotten the tree out of the closet...and then I looked at base of the tree. 


Talk about trying to fit a square hexagon in a round hole...I was momentarily devastated! The base was slightly more than a half an inch larger than the hole that my dad had cut. (Word of advice...measure your tree before you cut the log!) Luckily, the plastic, hexagon piece came off with some serious force. However, the bottom was then much smaller than the hole...but that was something I knew I could fix! 


I cut up some newspaper, rolled it up, and secured it with a rubberband. This took a while because I had to add more newspaper a couple of times and I had to adjust the hole in the center, but it eventually worked. 


There you have it...snug as a bug! It does wiggle a little, but it is not going to tip! I will probably find something more durable before we have little kiddos running around! 

For now I am thrilled with the final look! Not only does it look great, it also lifts the tree up so it is taller and presents actually fit under it! 


I wasn't sure I was going to get to put it up on Saturday at first...so glad I did! What do you think? I still have an extra stump if anyone is interested...and it already has a hole cut in it! 

decor

Lovely Little Snow Globes

Tuesday, November 20, 2012

Okay, the other day I learned a very important lesson that I really think I should share with all of you! Do NOT enter Wal-Mart through the garden/christmas section just because you want to look around...that won't happen! Anyway, the other day I ran to Wal-Mart really quickly to pick up something totally unrelated to Christmas, and I decided that it wouldn't hurt if I just walked through the holiday section. That is when I spotted this! 


Yes, those are beautiful little trees for just 75 cents! The second I saw them I thought of some rustic snow globes that pinned last year, and I just couldn't pass them up at that price. So, I picked some out and proceeded to find some fake snow. 


Unfortunately there is no good fake snow at Wal-Mart. There were only two options to choose from...one was super glittery and the other looked like a shredded plastic bag (neither were looks that I was going for). I also knew that I didn't need a large amount, and I didn't want a bunch of extra snow that could make a mess all over my house. So, I improvised...and got this snow filled penguin ornament instead! 


There was just the right amount of small snow flakes that I needed, and this guy was only $1. That was all I had to buy! I still have a bunch of jars left over from the wedding, and I have been trying to find some ways to use them around the house...like making this colorful mason jar. So, the whole project only cost me $3! The orignal pin was inspired by mason jar snow globes from Anthropology...and I am sure that they charged more than $3. Success! 

I picked out a few jars that were different shapes and sizes, and taped a tree to each lid. Then I poured a little bit of the snow in the bottom of each jar. You really don't need that much snow...just enough to cover the bottom. 


I carefully placed the lid back on the jar and turned it upside down to see my finished snow globe!


I know, I know...that wasn't the look I was going for! The tree was too tall for my small jar...so I had to trim the bottom off of that tree and secure it back to the lid. The other trees didn't need any adjusting. The whole project took me about 10 minutes, and I ended up with three lovely little snow globes.


They are pretty, stinkin' cute...aren't they? 

christmas tree

Christmas Tree Project

Thursday, November 15, 2012

No, I have not put up our Christmas tree yet. I am waiting until after Thanksgiving to put it up, but I had some prepping to do. 

I love our little Christmas tree! Every year we decorate it with the same rustic ornaments (I added a couple new ones last year, but that was kind of a battle). This year I want to add another rustic touch. I have to thank my dad for this one...I wouldn't have been able to do it without him (he is always helping me with DIY projects...well, the ones the involve power tools). So, out to the woods we went. 


Dad cut a fallen tree into sections, and I picked one that I thought would work for my project. The piece that I picked was pretty large...so Dad had to cut it in half. We ended up hauling both pieces back to the house, because I wasn't sure which one I liked better. 


Once we got back from the woods we had another task to tackle. (Note: By we I really mean Dad...power tools were still needed for this step.) We had to drill a hole in the center of the stump. How big did we need to make the hole? That is a good question...a question that I still don't really know the answer to. I didn't actually get our Christmas tree down to measure it before we started this project...one because I knew it would be too tempting to put up if it was in my way somewhere else in the house, two because I needed Dane's help getting it down, and he wasn't home. However, there was a random Christmas tree in the shed that we used to determine the size of our hole...fingers crossed that our tree fits! 


Once I got home I started sealing the log. I used two coats of a pine stain and sealer. This step needs to be done in a well ventilated area outside! It is really smelly! I made sure to get the stain deep in all of the cracks of the bark. I really like the look of the darker stump. 


What do you think? I am not wishing away Thanksgiving, but I am excited to get my tree up. 

Oh, and I have an extra stump with the whole already drilled! If you are interested in having your own stump tree stand, let me know! 

Calendar

November

Monday, November 12, 2012

Where has this year gone? I feel like it should still be February! October sure was a great month. Dane and I celebrated our first anniversary. We took a little road trip to St. Charles and spent the day in the historic district. You read about what I got Dane for our anniversary here. We really did have a lot of fun in October. Dane and I also went to a game at Busch Stadium and celebrated Halloween at a bowling tournament (Dane was a hunter, I was a loofah). 


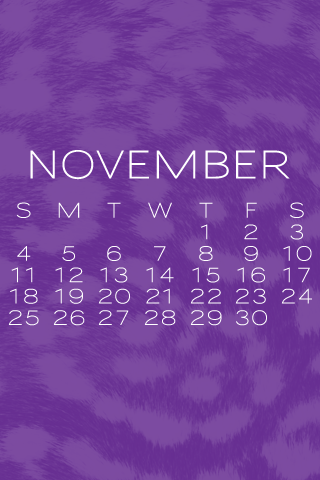
What does November have in store? Well, I have a lot of photo shoots, I have several holiday projects planned, and I am looking forward to spending time with my family for Thanksgiving. Make sure you download the November iPhone calendar (I am slightly in love with animal print right now...hope you enjoy it)!


What fun stuff do you have planned for November? 

chalkboard art

Just a Little Wall Decor

Wednesday, October 31, 2012

The walls in our house are still pretty bare. Before I painted all of the rooms I was sure to fill in the all of the nail holes that were left my the previous owners (who we love and adore, but they had more stuff to hang on the walls than we do). Anyway, I think I have been slightly nervous about putting a nail in the wall...it seems so permanent! However, I have officially placed a nail hole in our living room wall. It was about time, the empty walls were starting to depress me. What did I hang up? A chalkboard! We already have a chalkboard refrigerator, but you can never have too many chalkable items in your home! I have to thank my sister-in-law, Lacy, for this beauty! It really is the perfect addition to our home!


I absolutely love the rustic, wooden frame. Plus, it makes a great photography prop! I take it to almost all of my photo shoots, and that means I get to change the message frequently. After each shoot I come home and pick a quote (usually from Pinterest) to write and display! Right now it looks something like this. However, I am sure that will change soon, and I can't wait to add some other decor (including another chalkboard project) to my still pretty empty walls! 

gift

366 Days

Monday, October 22, 2012

Dane and I have been married a full year (and 7 days)! Where on earth did the time go? It seems like yesterday I was waiting patiently to say "I do". The time has gone by quickly, and our first year of marriage was a very special one! So...of course I wanted to get him a very special gift! 

If you have ever tried to get Dane a gift you know it can be tricky. He really wanted money, but that didn't seem like a special one year anniversary gift to me! I had to get pretty creative. This was the criteria: 

It had to be something that he would love. 
It had to be paper (sticking with tradition for the first year). 
It had to satisfy my need to be sweet and romantic. 

I know...I looked at that list and thought it was going to be a big challenge. I started adding some numbers in my head, and then I realized something pretty cool! Some of the most important numbers in our relationship add up to exactly 100! 

17: We met on my 17th birthday (unless you count the time we were 8 at the county fair).

22: Dane's birthday is March 22nd.

24: We started dating on February 24th.

15: Dane proposed on April 15th.

15: We got married on October 15th. 

7: We have been friends for 7 years (that seems like a long time). 


I already had some pretty, blank cards. I gathered several that were colors that Dane would like. I needed 7 cards and 6 envelopes total. I wrote a different number on the front of each envelope. On 6 of the cards I wrote why each number was so special to us, and on the other card I wrote about how thankful I was to be married to him. I am not going to share exactly what I put on each card (trust me it would bore you and make this post very long). Once all of the cards were done I tucked them in their corresponding envelope with cash. If the envelope said 17 there was a card and $17 dollars inside. In other words, he got what he wanted, I got to be a cheesy romantic, and I met the paper requirements! Success!

iphone wallpaper

October is Here...and Halfway Gone

Wednesday, October 17, 2012

Wow...I can't believe the month is already halfway over! It has been a really busy month (obviously...I haven't written a blog post yet!), and it has gone by really quickly!


September was a great month! I made a wreath, celebrated my birthday with my amazing friends and family, and I spent a lot of time taking pictures for some pretty cool people! 

October has already been a month worth remembering. Dane and I celebrated our 1 year anniversary (I will share more about that soon)! I have also been adding some decor to the little place we call home...I will share that with you soon too! For now, Happy October! I hope you have a wonderful month! 

Here is an iPhone wallpaper. 

DIY

Wreath...Yes, Another One

Friday, September 28, 2012

Okay, I think I may have a slight addiction. I have been on Pinterest a lot lately (no, that is not what I am addicted to). I have just been looking for some simple and fun DIY project to try and share with all of you. However, I have recently started to notice a trend...I seem to be pinning a lot of wreaths! It really isn't problem (the wreaths are adorable), but I am collecting quite the stockpile of door decor. So...I am sorry, but this is another DIY wreath post.

I made a cute fall yarn wreath earlier this month, and it is now hanging out on one of our kitchen walls. Shortly after making that wreath I found this tutorial, and I fell in love with the fullness of the tulle wreath. Of course I had to try to make it!


The supply list is short and sweet: 
Styrofoam Wreath Form 
Tulle (I used two spools) 
Extra Decorations (optional) 

I started out by cutting my tulle. I used black tulle and black, glittery tulle, and I cut each strip about 12 inches. You can make your strips smaller or larger if you would like, but I found that I liked the look of the 12 inch strips. Then I began tying the tool around wreath form. I tied the tulle in a pattern of 4 and 2. I tied 4 black strips on and then I tied 2 glittery strips. Note: I would not make a wreath entirely out of glittery tulle. I don't think it would be fluffy enough.

I admired my pretty, little wreath for a few days before I decided what to decorate it with. This wreath is intended for Halloween (yeah, I know it isn't even October...i like decorating). I thought it would be fun to decorate with some shiny spiders. However, I couldn't find any shiny spiders. So...I had to make my own! 

I picked up a bag of 100 spider rings at Wal-Mart for about $2.00...I already had some silver spray paint on hand so I didn't need anything else. 


After cutting off the ring on the back of the spider I spread them out on a piece of paper and sprayed away. 


I quickly found out that the color still kind of shows through the paint, and I really liked the look of the purple, painted spiders. So, I ended up spraying some more of those for my wreath. 

Once the spiders were dry I hot glued them into place on the wreath. 


I think this will add the perfect touch to my Halloween decorations! Don't worry, I took it down. I am not going to decorate for Halloween yet. 

{b}

Birthday

It's My Birthday!

Sunday, September 23, 2012


It is my birthday! Today is going to be a wonderful day. No balloons, no streamers, no party hats, just me, my family, and another day to spend together. I am not exactly thrilled about turning 24, but I am am extremely thrilled about all of the fun that I will have on this day. I am also grateful for all that I have learned in my 24 years. Anyway...I thought I would share some pictures with you. 


I hope you all have a wonderful day! 

{b}

DIY

Lovely Posts From the Week

Saturday, September 22, 2012


I am in desperate need of some paint organization! There is a very small amount of paint in some of my gallon containers, but I can't throw it away (there are going to be some paint touch ups in the future). I love this idea from iHeart Organizing, and I am sure I will be doing this very soon! 


I absolutely love the pop of color on these glasses. The DIY looks so easy! Check it out on BRIT+CO. I may have to make some of these little beauties. This would be a great way to dress up some dollar store glasses. 


DIY chalkboard paint...yes please! I am more than a little addicted to chalkboard paint (if you don't believe me ask my refrigerator)! I don't think Dane would have let me paint the fridge turquoise, but this shade is beautiful! What should I paint next? 

Okay...clearly I had paint on my mind when I wrote this post. I may have to tackle some of these fun DIYs in the next couple of weeks. 

{b}

blessings

My Life is Happy and Peaceful

Friday, September 21, 2012


Sometimes it doesn't take much to make me smile. Today was a wonderfully beautiful day. The weather was devine, I was surprised by a friend who I haven't seen for a long time, and this fortune was waiting for me at lunch! How can you have a bad day with a fortune like this? You can't! However, it isn't necessarily true. My life is happy and peaceful! There is no "will be" about it. 

I feel extremely blessed to be where I am. I have a wonderful, supportive husband, an incredible family, great friends, and amazing opportunities ahead of me. I cannot wait to see what the coming months bring. 

P.S. Sorry that I have not written in a while. I have been very busy this week, but I plan on getting on a schedule very soon! There will be another post tomorrow...and I have some DIY projects to share with you soon! 

Calendar

September 2012

Wednesday, September 12, 2012

Wow...this post is way past due! I have been meaning to do this post for a while, but I got sidetracked by some fun DIY projects. Anyway...September is here (and almost halfway gone)! I love September...probably because it is the month of my birthday! It is has already been a great month (not that I am surprised), but more on that a bit later. 

First, let's talk about August! 

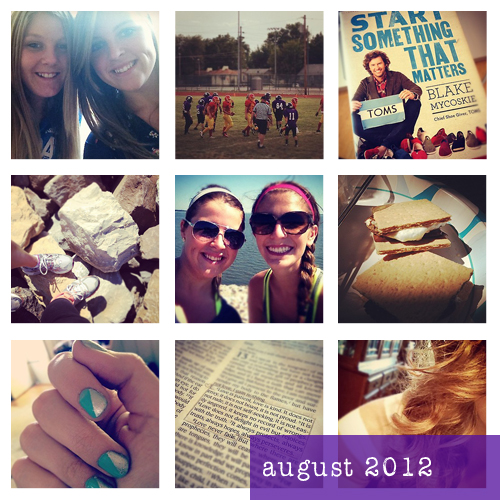
August was a great month! I had a lot of time to spend with family and friends, and I used that time to its fullest! I went on several little adventures during the month of August: I went to Raging Rivers, got to watch a couple of my brother's football games, spent a day at Carlyle Lake (and had s'mores!), and spent a lot of time reading! I didn't get as many home projects done that I would have liked to, but I was very busy with photography (I took pictures of my beautiful sister-in-law and her beautiful wedding!)


What do I have planned for September? The answer...a lot! I have already done a couple of DIY projects (you can see them here and here). However, there will be many more this month. There are several fall decorations that I want to get done! I also have some house projects that I want to finish up this month, and I am thinking about giving you a little house tour later this month. AND... I will be making a very big announcement regarding Brittney Laine Photography later this week! (Yes, you should be excited!) I am going to have to pencil in some time to celebrate my birthday! ;) 


I will keep you updated on all of my projects. Here is a September calendar for your iPhone (sorry it is so late).

DIY

Decorating for Fall

Monday, September 10, 2012

I am so excited for fall! I know that it is a little early to start decorating, but I really just can't help it. So...I decided to make a wreath! I made a wreath last fall, but I wanted to mix it up this year. I have been seeing yarn wreaths on Pinterest for a while, and I decided that I would attempt to make my own! 

I picked up a wreath form and some yarn at Wal-Mart. The first step is to wrap the form with your yarn. This takes a while, but it isn't difficult (if I do this project again I will use a thicker yarn).


After the wreath was wrapped entirely I decorated it with some cute burlap rosettes. I had a couple of small squares of burlap left over from our wedding, and I just made the rosettes the same way I did here (it is not as easy to do with burlap). I made a three little rosettes and attached them to my wreath with hot glue. I also used some extra burlap to hang the wreath. 


I love the finished look.

DIY

The Many Adventures of Dane and Brittney

Sunday, September 09, 2012

Dane and I love to travel to different places. We have gone on some sort of a vacation almost every year that we have been together. I have always wanted to hang up a map with pins in the places that we have been...then I found this! So...to Wal-Mart I went with a shopping list in hand. On the list: cork board, and pins (yeah that is all I needed!) Total cost: $8!

Steps: 

•Print an outline of the United States on a 8.5x11 sheet of paper.
•Cut out out the template, and trace it on the cork board. 


•Use an exacto knife to cut out the shape. (Make sure you put a magazine or something under the cork!)

•Cut a rectangle of cork and hot glue it to the back of your map.

•Print the locations in size 8 font or smaller and pin them in place. 


Now I can keep track of all of our adventures. I cannot wait to add our next pin! Who knows where it will be?! 

Making Every Drink Count

Wednesday, September 05, 2012

Making a positive impact in the world is now easier than ever. There are so many companies that are doing good with the help of consumers. I always enjoy purchasing from retailers that are making a difference. I have recently found several companies that are trying to provide clean drinking water to those in need. Clean water is something that many take for granted. While comparing some of the companies that are making a difference I have learned a lot! According to water.org, every 20 seconds a child dies from a water related illness! This information has been on my mind for a while, and I really want to encourage people to do even the smallest thing to make a difference. CamelBak is one of the many companies that is doing its part! Purchasing a Water.org Groove bottle will provide clean drinking water to one person for life! 


Another company, Faucet Face, is doing something similar. Every bottle purchased provides a minimum of 100 liters of clean drinking water. Why spend hundreds on bottled what when you can purchase one of these cool bottles and refill it again and again? 


These glass bottles will not only benefit those who receive the clean drinking water...there are several benefits for you as well! 

Do you want to do something to make a difference? Make sure you check out Charity: Water and Fishingcross for more ways to help.