christmas

A Real Tree...Well, Kinda Real

Sunday, November 25, 2012

I was looking forward to putting up my Christmas tree up all week. I didn't want to do it before Thanksgiving, but I had every intention of putting it up after work on Saturday. I love our Christmas tree! You can check out last year's post about it here. Anyway...I was especially excited about it this year, because I was finally going to get to put the tree stand to use! So, after work I got home and found that Dane had already gotten the tree out of the closet...and then I looked at base of the tree. 
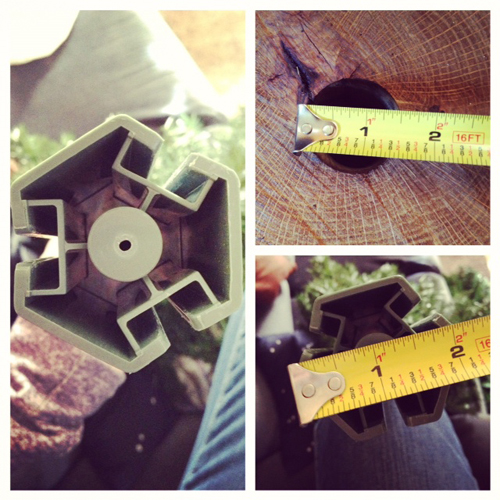

Talk about trying to fit a square hexagon in a round hole...I was momentarily devastated! The base was slightly more than a half an inch larger than the hole that my dad had cut. (Word of advice...measure your tree before you cut the log!) Luckily, the plastic, hexagon piece came off with some serious force. However, the bottom was then much smaller than the hole...but that was something I knew I could fix! 


I cut up some newspaper, rolled it up, and secured it with a rubberband. This took a while because I had to add more newspaper a couple of times and I had to adjust the hole in the center, but it eventually worked. 


There you have it...snug as a bug! It does wiggle a little, but it is not going to tip! I will probably find something more durable before we have little kiddos running around! 

For now I am thrilled with the final look! Not only does it look great, it also lifts the tree up so it is taller and presents actually fit under it! 


I wasn't sure I was going to get to put it up on Saturday at first...so glad I did! What do you think? I still have an extra stump if anyone is interested...and it already has a hole cut in it! 

decor

Lovely Little Snow Globes

Tuesday, November 20, 2012

Okay, the other day I learned a very important lesson that I really think I should share with all of you! Do NOT enter Wal-Mart through the garden/christmas section just because you want to look around...that won't happen! Anyway, the other day I ran to Wal-Mart really quickly to pick up something totally unrelated to Christmas, and I decided that it wouldn't hurt if I just walked through the holiday section. That is when I spotted this! 


Yes, those are beautiful little trees for just 75 cents! The second I saw them I thought of some rustic snow globes that pinned last year, and I just couldn't pass them up at that price. So, I picked some out and proceeded to find some fake snow. 


Unfortunately there is no good fake snow at Wal-Mart. There were only two options to choose from...one was super glittery and the other looked like a shredded plastic bag (neither were looks that I was going for). I also knew that I didn't need a large amount, and I didn't want a bunch of extra snow that could make a mess all over my house. So, I improvised...and got this snow filled penguin ornament instead! 


There was just the right amount of small snow flakes that I needed, and this guy was only $1. That was all I had to buy! I still have a bunch of jars left over from the wedding, and I have been trying to find some ways to use them around the house...like making this colorful mason jar. So, the whole project only cost me $3! The orignal pin was inspired by mason jar snow globes from Anthropology...and I am sure that they charged more than $3. Success! 

I picked out a few jars that were different shapes and sizes, and taped a tree to each lid. Then I poured a little bit of the snow in the bottom of each jar. You really don't need that much snow...just enough to cover the bottom. 


I carefully placed the lid back on the jar and turned it upside down to see my finished snow globe!


I know, I know...that wasn't the look I was going for! The tree was too tall for my small jar...so I had to trim the bottom off of that tree and secure it back to the lid. The other trees didn't need any adjusting. The whole project took me about 10 minutes, and I ended up with three lovely little snow globes.


They are pretty, stinkin' cute...aren't they?